Apache Airflow is an open-source platform that allows developers to programmatically create, schedule, and monitor workflows as directed acyclic graphs (DAGs). With Airflow, you can define complex workflows with dependencies and execute them automatically or manually. In this article, we will guide you through the process of setting up Airflow and creating your first DAG.
Step 1: Setting up the Airflow environment
The first step in creating your first DAG is to set up the Airflow environment. You can either install Airflow using pip, or you can use Docker to run Airflow in a container. Here, we will be using pip to install Airflow (version: 1.10.15).
First, create a virtual environment using the following command:
python3 -m venv myenv
Activate the virtual environment using:
source myenv/bin/activate
Install Airflow using the following command:
pip install apache-airflow==1.10.15
Airflow requires a database to store its metadata. By default, Airflow uses SQLite as its database. However, it is recommended to use a more robust database like MySQL or PostgreSQL for production environments.
Initialize the database using the following command:
airflow db init
Step 2: Creating your first DAG
Once the environment is set up, you can create your first DAG. A DAG is defined using Python code, and it consists of a collection of tasks that need to be executed in a specific order.
Creating a Dag is a Simple 4 steps process, let’s see those steps with an example of a simple DAG that contains two tasks:
a) Firstly, Import all the required modules/libraries/classes/functions.
from datetime import datetime
from airflow import DAG
from airflow.operators.bash_operator import BashOperator
b) Secondly, Creating a DAG object.
default_args = {
    'owner': 'AnkitRai-BioChemiThon',
    'depends_on_past': False,
    'start_date': datetime(2023, 4, 15),
    'retries': 1
}

dag = DAG('my_first_dag',
          default_args=default_args,
          schedule_interval='@once')
c) Thirdly, Creating all required tasks for your Dag.
task_1 = BashOperator(
    task_id='task_1',
    bash_command='echo "Hello, BioChemiThon!"',
    dag=dag)

task_2 = BashOperator(
    task_id='task_2',
    bash_command='echo "Goodbye, BioChemiThon!"',
    dag=dag)
d) Fourthly, Setting up the dependencies between the tasks.
task_1 >> task_2
Complete Code:
# import all required classes/functions in this program
from datetime import datetime
from airflow import DAG
from airflow.operators.bash_operator import BashOperator

# creating a default arguments dictionary
default_args = {
    'owner': 'AnkitRai-BioChemiThon',
    'depends_on_past': False,
    'start_date': datetime(2023, 4, 15),
    'retries': 1
}

# creating a DAG object
dag = DAG('my_first_dag',
          default_args=default_args,
          schedule_interval='@once')

# creating a 1st task using operator
task_1 = BashOperator(
    task_id='task_1',
    bash_command='echo "Hello, BioChemiThon!"',
    dag=dag)

# creating a 2nd task using operator
task_2 = BashOperator(
    task_id='task_2',
    bash_command='echo "Goodbye, BioChemiThon!"',
    dag=dag)

# set the dependency between the task_1 and task_22
task_1 >> task_2
In this above example, we define a DAG with the ID my_first_dag. We also define two tasks, task_1 and task_2, that execute simple Bash commands. Finally, we use the >> operator to specify that task_2 should be executed after task_1.
ScreenShots :
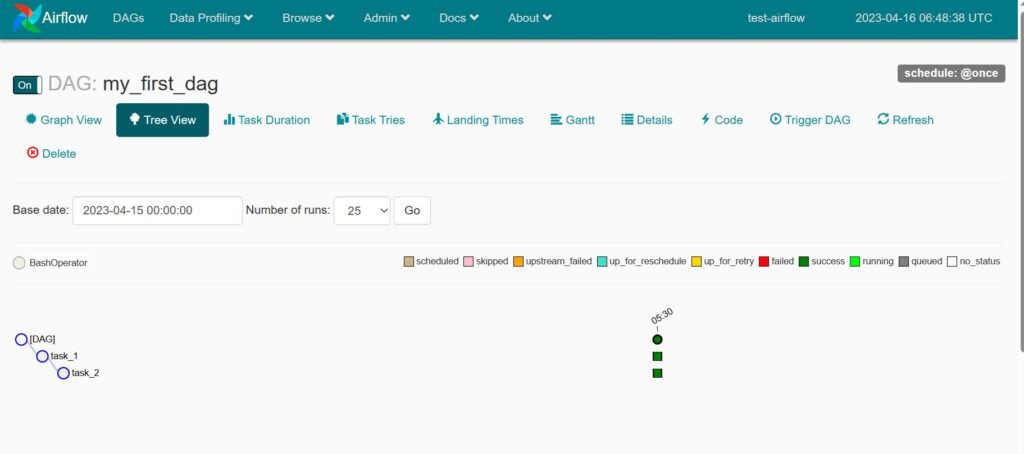
1) Tree View
2) Task_1 Log
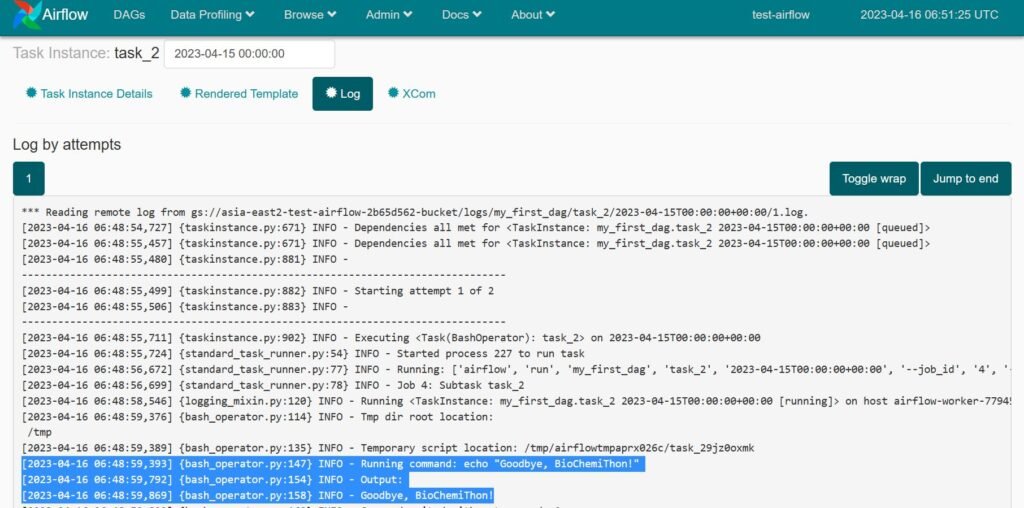
3) Task_2 Log
Step 3: Running your DAG
To run your DAG, you can use the Airflow command-line interface (CLI) or the Airflow web interface. To execute our DAG file, we need to start Apache Airflow webserver and Airflow scheduler on different-different terminal. We can do that using the following commands:
airflow webserver -p 8080
airflow scheduler
To run your DAG using the CLI, use the following command:
airflow dags test my_first_dag 2023-04-15
This will execute your DAG and its tasks, and you should see the output of the echo commands in your terminal.
You can access the Airflow web interface by navigating to http://localhost:8080 in your web browser. From there, you can navigate to the DAGs tab, find your DAG, and click the play button to run it.
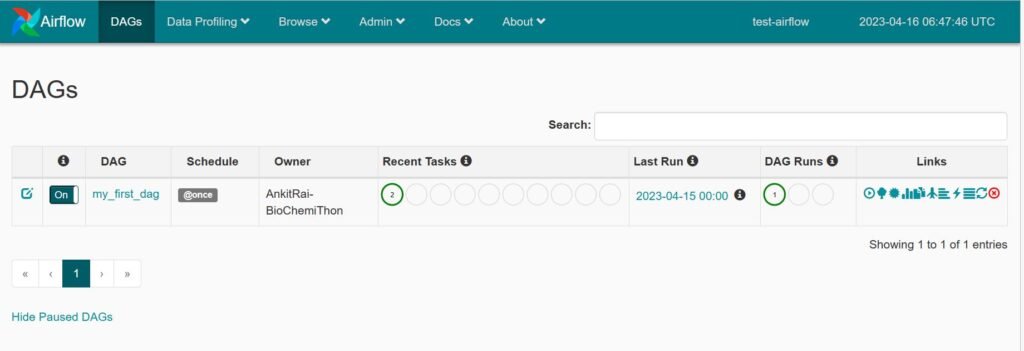
Airflow UI:
Conclusion:
Airflow is a powerful platform for programmatically creating, scheduling, and monitoring workflows. In this article, we have guided you through the process of setting up the Airflow environment and creating your first DAG. With Airflow, you can define complex workflows with dependencies, and execute them automatically or manually.