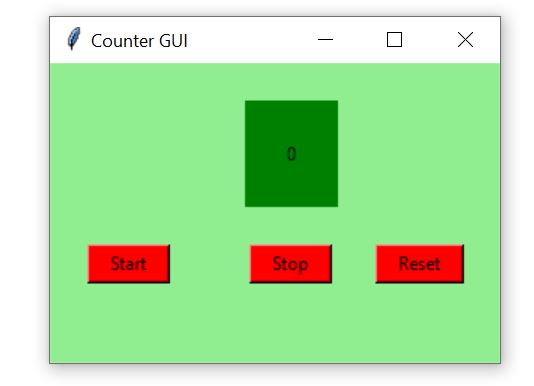
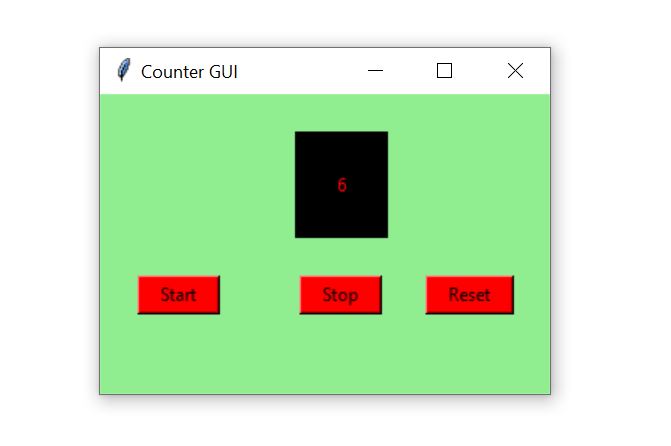
In this post, we will see how to create a Counter Gui Application in Python using tkinter library.
Steps to create GUI application :
- Create a front-end structure (GUI) of your application.
- Implement the working of the application in form of functions.
- Attach functions to the GUI like attach with buttons etc.
Let’s see the Implementation:
# Import all from tkinter
# to this program
from tkinter import *

# Declare global variable
window = None
counter = 0

# Define a function for
# starting the counter
def start() :

    # we specify that we want to
    # use global counter variable
    # using global keyword
    global counter

    # Create a label using Label() widget
    # with foreground and background
    # colours
    counterLabel = Label(window, fg = 'red',
                         bg = 'pink')


    # Place this widget in grid at (2, 2)
    # with internal x(horizontal) and y(vertical)
    # extra space from the text written in label
    # Also with x and y extra space from the
    # given widget
    counterLabel.grid(row = 2, column = 2,
                    ipadx = "25", ipady = "25",
                    padx = "25", pady = "25")

    # increment the counter by one
    counter += 1

    # set the text value in the label
    # using config() method
    counterLabel.config(text = str(counter))

    # calling start function on every
    # 1000 millisecond i.e. 1sec
    # using after() method
    counterLabel.after(1000, start)

    # Get a text from statusfield
    # entry box using get() method
    val = statusField.get()

    # if value match with "Stop"
    # then destroy this label
    # ,delete the content
    # of entry field and
    # decrement the counter value by 1
    if val == "Stop" :

        counterLabel.destroy()
        statusField.delete(0,"end")
        counter -= 1

# Define a function for
# stoping the counter
def stop() :

    # we specify that we want to
    # use global counter variable
    # using global keyword
    global counter

    # Create a label using Label() widget
    # with foreground, background
    # colours and text value on the label
    counterLabel = Label(window, text = str(counter),
                   fg = 'red', bg = 'black')


    # Place this widget in grid at (2, 2)
    # along with specified padding
    counterLabel.grid(row = 2, column = 2,
                    ipadx = "25", ipady = "25",
                    padx = "25", pady = "25")

    # insert the "Stop" string
    # value inside the
    # statusField entry box
    statusField.insert(0,"Stop")


# Define a function for
# reset the counter
def reset() :

    # we specify that we want to
    # use global counter variable
    # using global keyword
    global counter

    # set counter value to 0
    counter = 0

    # Create a label using Label() widget
    # with foreground, background
    # colours and text value on the label
    counterLabel = Label(window, text = str(counter),
                   fg = 'black', bg = 'green')


    # Place this widget in grid at (2, 2)
    # along with specified padding
    counterLabel.grid(row = 2, column = 2,
                    ipadx = "25", ipady = "25",
                    padx = "25", pady = "25")


# Main code
if __name__ == "__main__" :

    # Create a window container
    window = Tk()

    # Set background colour of window
    # container using configure() method
    # with background attribute
    window.configure(background = 'light green')

    # Set the configuration of window
    # container using geometry() method
    # width X length
    window.geometry("300x200")

    # Set the title of window container
    # using title() method
    window.title("Counter GUI")

    # Create a label using Label() widget
    counterLabel = Label(window, text = str(counter),
                   fg = 'black', bg = 'green')

    # Placing the widgets at respective
    # positions in table like structure
    # using grid() method

    # Place this widget in grid at (2, 2)
    counterLabel.grid(row = 2, column = 2,
                    ipadx = "25", ipady = "25",
                    padx = "25", pady = "25")

    # Create a Button and attached
    # function using Button() widget
    startButton = Button(window, text = "Start",
                    bg = "red", fg = "black",
                    command = start)

    # Place button widget in grid at (3, 1)
    startButton.grid(row = 3, column = 1,
                     padx = "25", ipadx = "10")

    # Create a Button and attached
    # function using Button() widget
    stopButton = Button(window, text = "Stop",
                    bg = "red", fg = "black",
                    command = stop)

    # Place button widget in grid at (3, 2)
    stopButton.grid(row = 3, column = 2,
                    ipadx = "10")

    # Create a Button and attached
    # function using Button() widget
    resetButton = Button(window, text = "Reset",
                    bg = "red", fg = "black",
                    command = reset)

    # Place button widget in grid at (3, 3)
    resetButton.grid(row = 3, column = 3,
                     ipadx = "10")

    # we will not attach this widget to the window
    # because we don't want to place it
    # this is used for only stoping and starting
    # the counter as a flag

    # Create text entry box for : status field
    statusField = Entry(window)

    # Start the window,
    # waiting for events and
    # updating the GUI.
    window.mainloop()
Output:
Thanks for reading this blog.
If you find this post useful please share it in your groups because Sharing is Caring.
If you have any doubts in understanding the above Code then please comment below, we will try to clear your doubts.
Would it be possible/relatively easy to build a code that increases multiple counts based on the click of an “increase button”. Then can reset individual counts based on a button adjacent to each fields count. Which would then wait to increase until the increase button for all fields is clicked twice?